GraphQL is a declarative data fetching spec that is invented by Facebook and open sourced in 2015. GraphQL uses a special language called query language which looks a lot like JSON objects. GraphQL is an alternative to REST API’s and have following benefits:
- GraphQL query string is sent to GraphQL server and instead of getting full response from server you only get the data that is needed by you.
- Query is nested and data is requested at once on single endpoint while in REST there are multiple requests on different endpoints.
- Backward compatible (new fields can be added without breaking anything and old fields can continue to function)
- Can wrap around existing API
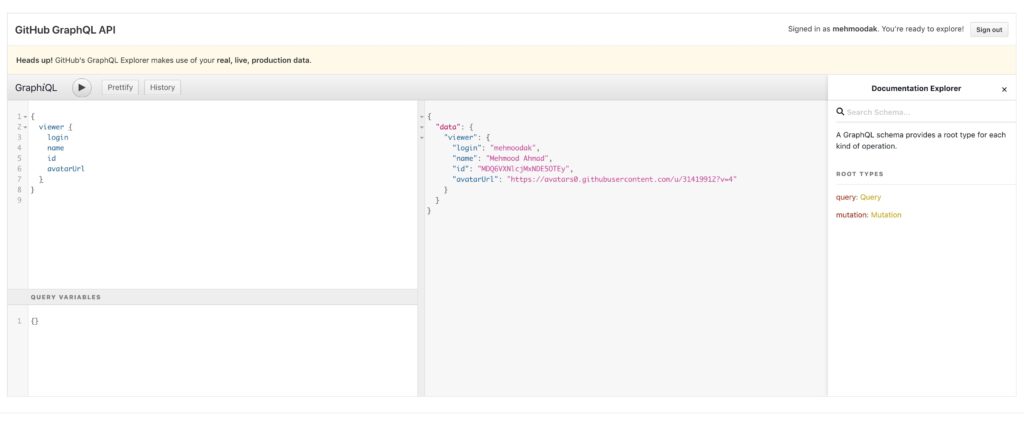
GraphQL also provides a client called “GraphiQL Explorer” which is in browser IDE through which you can test your queries. The main features of having an GraphiQL client are:
- It provides intellisense on queries which saves you from syntax errors.
- It maintains the history of all queries that has been run.
- Documentation of the API is generated automatically which is easy to understand and navigate.
There are two aspects of learning GraphQL one is using the API’s via query language and the other one is building a GraphQL server that parses the queries and responds to the requests. As this is an introductory article on GraphQL so we will only focused on learning about how to consume GraphQL API’s and for that we’ll use the GitHub GraphQL API Explorer.
GitHub GraphQL API Explorer is an official GitHub service through which you can get data via queries. We’ll use this service to get familiar with using queries.
How to use GraphQL API’s
GraphQL Queries
Basic Query
Queries in graphql is a somewhat similar to JSON structure You can use # for comments.
{
  # First Query!
  viewer {
    name
  }
}
{
viewer {
name
bio
id
company
avatarURL
}
}GraphiQL shows autocomplete suggestions while typing and full list of suggestions can be view by CTRL + SPACE. There is also a prettify button which can be used for proper formatting (remove comments).
Passing Arguments
{
  repositoryOwner(login: "facebook") {
    id
    url
  }
}
Note that unlike JSON objects double quotes are required and can’t be replaced by single quotes.
Understanding Schemas
What is GraphQL Schema?
The way our fields are setup are determined by ‘GraphQL Schema’. It specifies the types of objects and values in your data.
GraphQL schemas are very well documented in GraphiQL client which majorly have two sections:
- Query: Act’s like GET request and used to get data.
- Mutation: Act’s like POST/PUT/DELETE etc and is used to change data.
Schema majorly have two types:
- Object Types: These are the type of the objects defined by our server. Example from GitHub API Explorer are
viewers, repositories, issues - Input Types: These are the basic types of the inputs i.e.
Integer, Float, String, Boolean, Null, Enum, List, Object
! in schema indicate required fields.
You can query the schema directly with __types or __schema (useful when no GUI is available).
{
  __type(name: "Repository") {
    kind
    name
    description
  }
}
{
__schema {
queryType {
name
description
fields {
name
description
isDeprecated
deprecationReason
}
}
}
}Handling Data
Aliases
Errors can occur when you use same field with different arguments and aliases solved this problem.
{
  graphqlProject: repository(name: "graphql", owner: "facebook") {
    id
    description
    createdAt
  }
  reactProject: repository(name: "react", owner: "facebook") {
    id
    description
    homepageURL
  }
}
It can mess up with auto completion a bit.
Fragments
These are the reusable sets of fields that can be included in queries as need (like a function to reduced repetitions).
{
  graphqlProject: repository(name: "graphql", owner: "facebook") {
    ...repoFields
  }
  reactProject: repository(name: "react", owner: "facebook") {
    ...repoFields
  }
}

fragment repoFields on Repository {
  id
  description
  homepageUrl
}
Nested Fields
There are two main things to get data from nested fields:
- Edges: Shows a connection with other fields (like a array)
- Node: Represents all different fields present in edges (like a element in array)
 {
  viewer {
    id
    name
    isEmployee
    location
    databaseId
    repositories(last: 5) {
      edges {
        node {
          id
          name
        }
      }
    }
  }
}
We can also write multiple nested queries.
{
  repository(owner: "github", name: "opensource.guide") {
    id
    name
    description
    watchers(first: 5) {
      edges {
        node {
          id
          name
          company
        }
      }
    }
    issues(last: 5) {
      edges {
        node {
          author {
            avatarURL
            login
            path
          }
          id
          title
        }
      }
    }
  }
}
We are also using pagination in above queries to get a subset of data. Pagination is tracked via cursor attributes that is present on edges.
Operations and Variables
Operations Names
So far we are using GitHub API using unnamed queries. You can create your Operation/Query name to distinguish between queries.
query FirstFiveOrgMembers {
  organization(login: "facebook") {
    id
    name
    members(first: 5) {
      edges {
        node {
          id
          name
        }
      }
    }
  }
}
Variable Definition
We can add flexibility to our queries by using variable as arguments. In GraphiQL there is a dedicated panel for variables.
query FirstFiveOrgMembers($login: String!) {
  organization(login: $login) {
    id
    name
    members(first: 5) {
      edges {
        node {
          id
          name
        }
      }
    }
  }
}
You can use these as variables one by one in dedicated variable panel. Generally we do this programmatically by passing different variables to same query multiple times. (act like a loop)
{
  "login": "facebook"
}

{
  "login": "google"
}

{
  "login": "airbnb"
}
You can also define multiple variables like this
query FirstNOrgMembers($login: String!, $n:Int!) {
  organization(login: $login) {
    id
    name
    members(first: $n) {
      edges {
        node {
          id
          name
        }
      }
    }
  }
}
{
"login": "facebook",
"n": 5
}Mutations
What is mutation?
Mutations are defined while setting up GraphQL server and it’s similar to PUT/DELETE requests in REST but in mutation we send new data as payload in mutation.
- GraphQL assumes that mutations can have side effects and it changes the dataset behind the schema.
- API defines which mutations are allowed.
Create Mutations
We are going to add comment on GitHub issue using GraphQL mutation.
# Query of getting issue
{
  repositoryOwner(login: "eveporcello") {
    repository(name: "graph-ql-testing") {
      issues(first:1) {
        edges {
          node {
            id
            title
            body
          }
        }
      }
    }
  }
}

# Using comment Mutation of the issue
mutation NewComment($input: AddCommentInput!) {
  addComment(input: $input) {
    clientMutationId
    subject {
      id
    }
  }
}
Query variables (payload)
{
  "input": {
    "clientMutationId": "14142",
    "subjectId": "MDU6SXNzdWUyMDkwMTAxOTg=",
    "body": "Great idea - thanks!"
  }
}
Confirm comment addition
{
  repositoryOwner(login: "eveporcello") {
    repository(name: "graph-ql-testing") {
      issues(first:1) {
        edges {
          node {
            id
            title
            body
            comments(last: 5) {
              edges {
                node {
                  id
                  body
                }
              }
            }
          }
        }
      }
    }
  }
}
Add a Reaction Mutation
If until now you are feeling yourself comfortable with GraphQL queries and navigating through the docs then your should be to do a quick test:
- Use
addReactionmutation to add a reaction to a subject (using docs effectively will be a key here)
If you are able to complete addReaction mutation then it’s great else here is the solution.
mutation CheckReaction($input: AddReactionInput!) {
  addReaction(input: $input) {
    reaction {
      content
    }
  }
}
Query variables (payload)
{
  "input": {
    "clientMutationId": "5159212",
    "subjectId": "MDEyOklzc3VlQ29tbWVudDI4NDcyODQ4NQ==",
    "content": "HEART"
    # “content”: “HOORAY”
  }
}
How to setup GraphQL Server
In this section we’ll setup GraphQL on our server that will be responsible to understand graphql queries and respond to them.This section is further divided into the following parts:
- Walk-through the set of GraphQL server
- Explore types and schemas
- Setting up data persistence with databases
- Setup mutations for CUD operations.
1. Walk-through the setup of GraphQL server
For setting up graphql server we’ll use VSCode as our main editor and all the progress will be stored in this repository from which you can view step by step progress via commits list. We’ll use node/express as our main backend during this setup so familiarity to these will be helpful.
First of all install ‘GraphQL for VSCode’ extension for intellisense support.
Server setup with ES6 support
Install following packages
npm init
npm install express nodemon
npm install -D babel-cli babel-preset-env babel-preset-stage-0
Add .babelrc and setup base server in index.js using express. And for running this setup add start script on package.json that have ability to compiles our ES6 code.
start: "nodemon ./index.js --exec babel-node -e js"Now run npm start and visit your local server.
Commit: 🚧 WIP: setup server with ES6 support
Initial GraphQL Setup
Install graphql specific packages
npm install graphql express-graphqlAdd schema on data/schema.js and update index.js to use that schema and return values, this file also make GraphiQL available on /graphql through which you can run queries.
If you have same schema as ours then this query should return you the value that is set on schema
{
  hello
}
Commit: 🚧 WIP: initial graphql setup
Basic GraphQL Schema
In the previous step we used a very vague schema, proper definition of schema also defines the query type and resolver for each API input.
- Type: What type of data we expects
- Resolver: These are the functions that respond to our queries.
Proper schema definitions ensure good documentation and proper error messages on wrong inputs. Now we’ll add type and resolver in our code.
Task:
- Add type
Friendin our schema fileschema.js. - Add it’s respective resolver in
index.js.
Confirmation: Get data using following query
{
  friend {
    id
    firstName
    lastName
    gender
    language
    email
  }
}
The info of our type will be present on docs provided by graphql.
Commit: ✅ DONE: basic graphql schema
2. Types and Schemas
In this section we’ll discuss the types and schemas in detail.
Object Types and Fields
We can mark our fields as our object types and we can also make our field mandatory by using ‘!’.
Task:
- Define
Emailas type and include multiple emails in ourFriendschema. - Update resolver based on changes in schema
Confirmation: Get data using following query
{
  friend {
    id
    firstName
    lastName
    gender
    language
    emails {
      email
    }
  }
}
Commit: 🚧 WIP: add object types and fields
Add Mutations
Read this section for details about mutation.
Task:
- Add mutation in schema for
createFriendwhich takes additional typeFriendInputas payload. - Add resolver for createFriend in
index.js
Confirmation: Check mutation using this query
mutation {
  createFriend(input: {
    firstName: "John",
    lastName: "Doe",
    gender: "Male",
    language: "English",
    email: "me@me.com",
  }) {
    id,
    firstName
    lastName
  }
}
Commit: ➕ ADDS: createFriend mutation
Refactor resolvers
Task: Refactor resolvers in to separate file.
Commit: 🔨 REFACTOR: resolvers
Scalar Types
GraphQL by default have these scalar types Integer, Float, String, Boolean, ID etc.
Task: Use these scalar types in our schema and update resolvers accordingly. We are also going to use in memory database for our friends in this step.
Commit: ➕ADDS: scalar types
Enumeration Types
In graphql we can use enumeration types to restrict inputs to defined set of values.
Task: Use enumeration type on gender field.
Confirmation: Create friend using the values from the given enumeration.
mutation {
  createFriend(input: {
    firstName: "John",
    lastName: "Doe",
    gender: "MALE",
    language: "English",
    email: "me@me.com",
  }) {
    id,
    firstName
    lastName
    gender
  }
}
Commit: ➕ADDS: enumeration on gender
List of types inside another
Task: Add contacts in schema that indicates a list of Contact while each contact contains firstName and lastName.
Confirmation:
Set new friends with contacts.
mutation {
  createFriend(input: {
    firstName: "John",
    lastName: "Doe",
    gender: FEMALE,
    language: "English",
    email: "me@me.com",
    contacts: [
      {
        firstName: "Contact",
        lastName: "1",
      },
      {
        firstName: "Contact",
        lastName: "2",
      }
    ]
  }) {
    id,
    firstName
    lastName
    gender
    contacts {
      firstName
      lastName
    }
  }
}
Commit: ➕ADDS: nested object types
Using GraphQL Tools
We will use graphql-tools in this section. It’s more JS friendly but also add a bit more code.
Task: Integrate graphql-tools in our code.
Confirmation: Create and read friends to confirm that everything is working fine.
Commit: ✅ DONE: integrate graphql tools
Data Persistence and Mutations
Integrate MongoDB
For data persistence we’ll use the NoSQL database Mongo with Mongoose so familiarity with these will be helpful.
Task:
- Install mongoose and run mongo server.
npm install mongoose- Create Friend schema with mongoose and connect it will mongo instance.
- Remove our in memory database implementations and set and get data from mongo.
Confirmation: Create new friends and confirm by getting them.
Commit: ✅ DONE: setup data persistence
Add update and delete mutation
Task:
- Add update mutation in schema and resolver.
- Add delete mutation in schema and resolver.
Confirmation:
Check update mutation.
mutation {
  updateFriend(input: {
    id: [ID_HERE],
    firstName: "John",
    lastName: "Update",
  }) {
    id,
    firstName
    lastName
    gender
    contacts {
      firstName
      lastName
    }
  }
}
Check delete mutation.
mutation {
  deleteFriend(id: [ID_HERE]")
}
Commit: ➕ ADDS: update and delete mutation
Conclusion
We have covered all the basics of GraphQL for more info and update read the docs.